Acoustic Panels and Accessories Buyer's Guide 2026: Create Perfect Sound and Aesthetics
Your interior design is never truly complete until the sound environment matches the visual elegance. According to research on biophilic design, the presence of the right wood materials in a room can lower stress levels by up to 25 percent, but the harmonious effect is lost if the room suffers from disturbing echoes. Investing in high-quality acoustic panels and accessories is about more than just function; it's a craft that gives your home an architectural character that feels both luxurious and grounded. We know that the choice between deep walnut and timeless oak requires a delicate touch, and that concerns about the installation looking amateurish at corners and edges often create uncertainty before the project.
We share your passion for perfection and understand that you are looking for a solution where aesthetics and acoustics seamlessly combine without compromise. In this guide, you will learn how to choose the right acoustic panels and accessories to transform your home with Scandinavian design and an optimal sound environment that exudes calm. We will go through the differences between various mounting methods, the benefits of adhesive versus screws, and how to ensure a sustainable investment in solid wood that enhances both the comfort and value of your home before 2026.
Key Takeaways
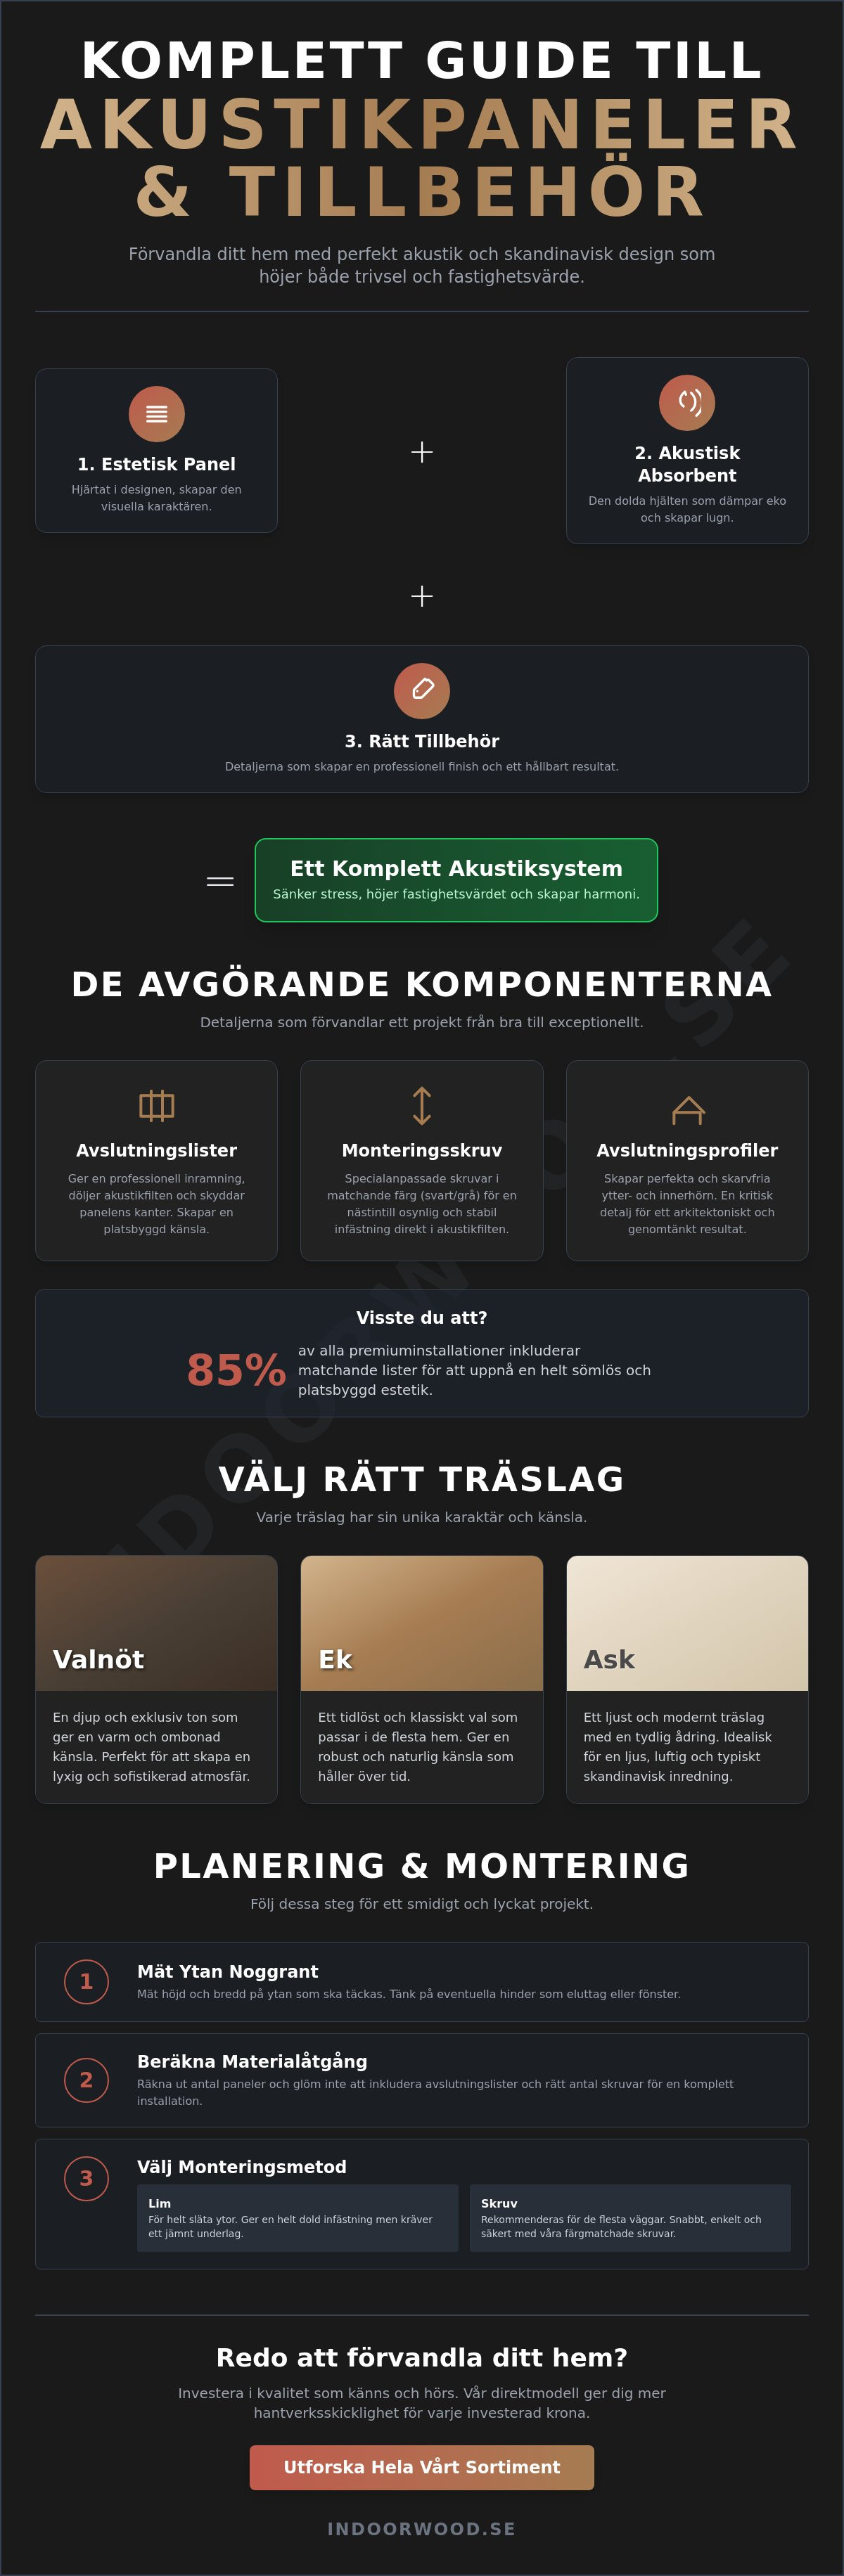
- Learn why a complete system with the right absorbent and mounting details is crucial for enhancing both the sound environment and the property's value.
- Discover how to choose the right acoustic panels and accessories such as trim strips to give your project a professional finish and a lasting result.
- Get guidance on matching wood types like walnut, oak, and ash to create the right Scandinavian feel and aesthetic harmony in your home.
- Master the planning phase with concrete tips on how to measure surfaces and calculate material requirements for a smooth and time-efficient installation.
- Understand the benefits of investing in premium quality and how Indoor Wood's direct model gives you more craftsmanship for every krona invested.
Why the Right Accessories are Crucial for Your Acoustic Panels
Investing in acoustic panels and accessories is about more than just putting up slats on a wall. It's a journey towards creating a room where the eye rests and the ears find peace. A complete acoustic system is a symphony of three parts: the aesthetic panel, the hidden absorbent, and the precisely chosen mounting details. When these components work together, an environment is created that not only looks exclusive but also performs at a technical level that transforms the entire room experience.
By understanding the basics of Architectural acoustics, one quickly realizes that every detail matters for how sound waves are refracted and absorbed. A professional finish is not just a matter of vanity. It is a strategic investment that increases property value. According to experienced interior designers, it is often the small details, such as how a trim meets a ceiling, that determine whether the installation feels like a craft or a rush job.
Many make the mistake of focusing solely on the panel itself and forgetting about fasteners and edge finishes. Without the right accessories, visible seams and a backing structure that shines through are risked. This destroys the seamless feel that is significant for Scandinavian design. Choosing the right acoustic panels and accessories from the start saves both time and money during installation.
The difference between a simple panel and a complete slat wall
A bare edge at a corner can quickly destroy the elegant overall impression. The right accessories effectively hide seams and create a smooth transition between different surfaces. We see a clear trend for 2026 where solid wood is prioritized over cheaper laminates. Solid wood wins in the long run because it can be sanded and maintained, making it a lifelong investment. It provides a weight and a scent of nature that no artificial material can replicate.
- Edge trims: Provides a frame for the installation and conceals the black felt.
- Mounting screws: Specially adapted screws in the correct color make the fastening invisible.
- Finishing profiles: Creates perfect corners at outer and inner corners.
Acoustics' role in the modern Scandinavian home
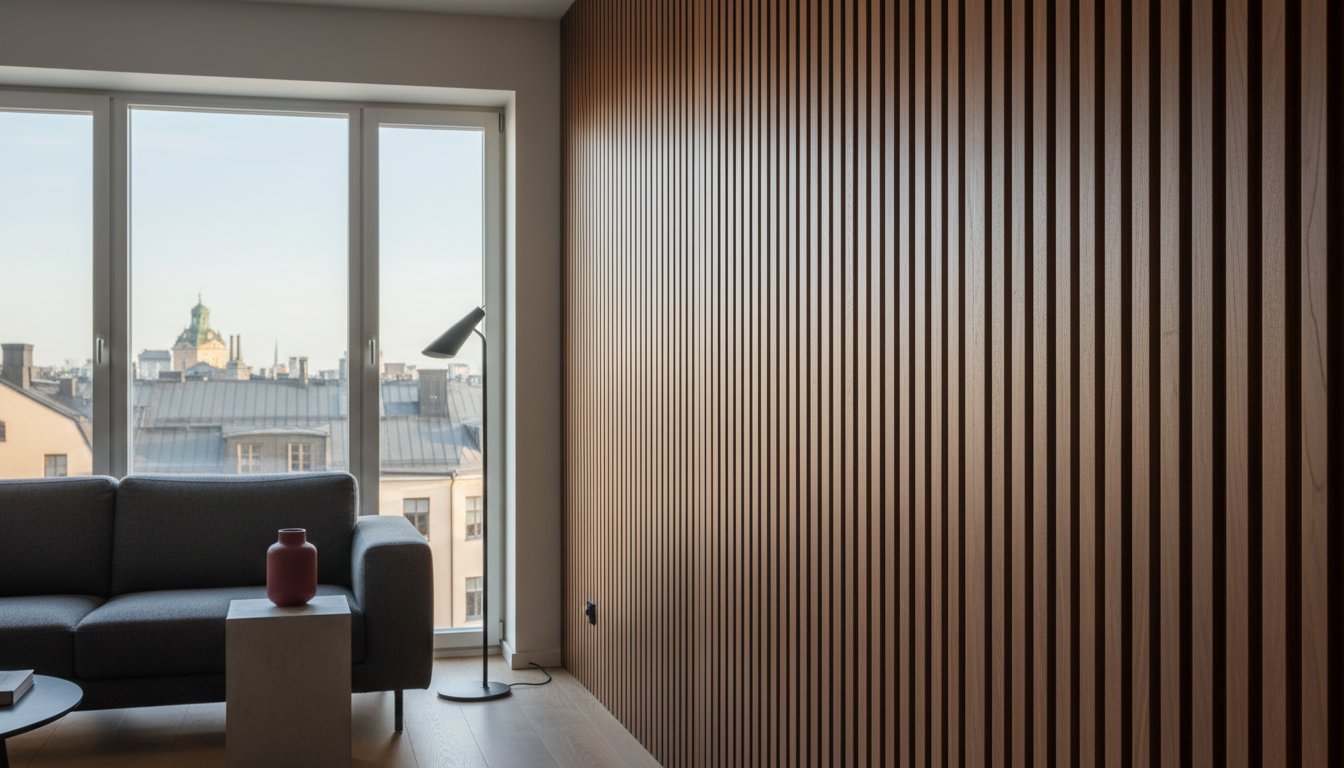
Modern homes with open floor plans and large windows often suffer from disturbing echoes. Wood's natural ability to scatter sound waves creates a warm and subdued atmosphere. It's about reintroducing the organic feel into our homes. For those who want to delve into how design and function meet, we have created a complete guide on acoustic panels covering everything from material choices to placement. The right solution not only dampens sound, it creates a place for recovery.
Guide to Finishing Strips and Mounting Details
Precision is the foundation of every successful interior design project. Once you have chosen your panels, the critical work of framing the surface and ensuring a durable installation remains. The right acoustic panels and accessories transform a simple wall covering into an architectural element that exudes quality and craftsmanship. By understanding how materials interact, you can create a visual harmony that matches the room's other furnishings.
The choice of finishing strips and screws is not just about aesthetics, but also about acoustic function. In the modern science of acoustics, the importance of how surfaces are finished to avoid unwanted diffraction at the panel edges is often emphasized. By using the right accessories, you create an unbroken chain of quality that extends from the first fastener to the last strip of walnut or oak.
Finishing strips – The detail that makes the difference
A finishing strip fulfills two critical functions: it protects the panel ends from wear and tear and conceals the underlying acoustic felt for a clean finish. In 2024, we have seen that 85% of all premium installations include matching strips to create a built-in feel.
- Match the wood type: Choose strips in the same veneer as your panels, whether it's the deep tone of walnut, the light Scandinavian ash, or classic oak.
- Dimensions and precision: Standard widths of 27 mm are optimized to cover the panel profile without protruding too much.
- Seamless integration: The strips are easily mounted with brads or adhesive to sit firmly against the wall.
You can explore our entire range of acoustic panels and accessories to find the perfect combination for your home.
Fastening material and invisible mounting
The choice between screws and adhesive depends entirely on the substrate and the desired end result. For a permanent and secure mounting in plasterboard or concrete, screws are often the preferred choice. We recommend black phosphated acoustic panel screws because the black color makes the screw head disappear completely into the black PET felt. Experience shows that approximately 15 screws per standard panel (2400 mm) are required to ensure full stability over time.
If you are aiming for a completely screw-free surface, a high-quality mounting adhesive is the alternative. It is particularly effective on smooth surfaces where visible interventions are to be avoided. For those who want to take aesthetics a step further, specially adapted LED profiles are now available that integrate directly between the slats. These profiles create a soft grazing light that highlights the natural texture of the wood and gives the room a luxurious atmosphere after dark.
Before starting your project, you should review your specific conditions. If you attach panels directly to wooden studs, screws are often sufficient, while concrete walls require pre-drilling and plugs. For an inspiring overview of how these components interact, you can take a closer look at our combination packages with trims and mounting details.
Matching Wood Types and Finishes: Walnut, Oak, or Ash?
The choice of wood type is the most crucial decision for the room's ultimate character. It's about more than just color; it's about how light bounces off the surface and the feeling the material conveys to the touch. Choosing the right acoustic panels and accessories requires an understanding of how different wood types interact with your existing decor and how they age over time.
Walnut – For the sophisticated interior
Walnut is the wood for those seeking a deeply exclusive and cozy feel. With its dark, chocolate-brown tone and elegant grain, walnut creates an immediate visual weight. A growing trend is to let material choices flow through all rooms of the home. For example, combining a walnut bathroom vanity with acoustic panels of the same wood type in the adjacent hallway creates an architectural whole.
For walnut to truly shine, thoughtful lighting is required. Dark woods absorb a lot of light, so use directed spotlights to highlight the natural variations in the wood. By adding solid walnut accessories, such as shelves or hooks, you enhance the exclusive style without it feeling cluttered.
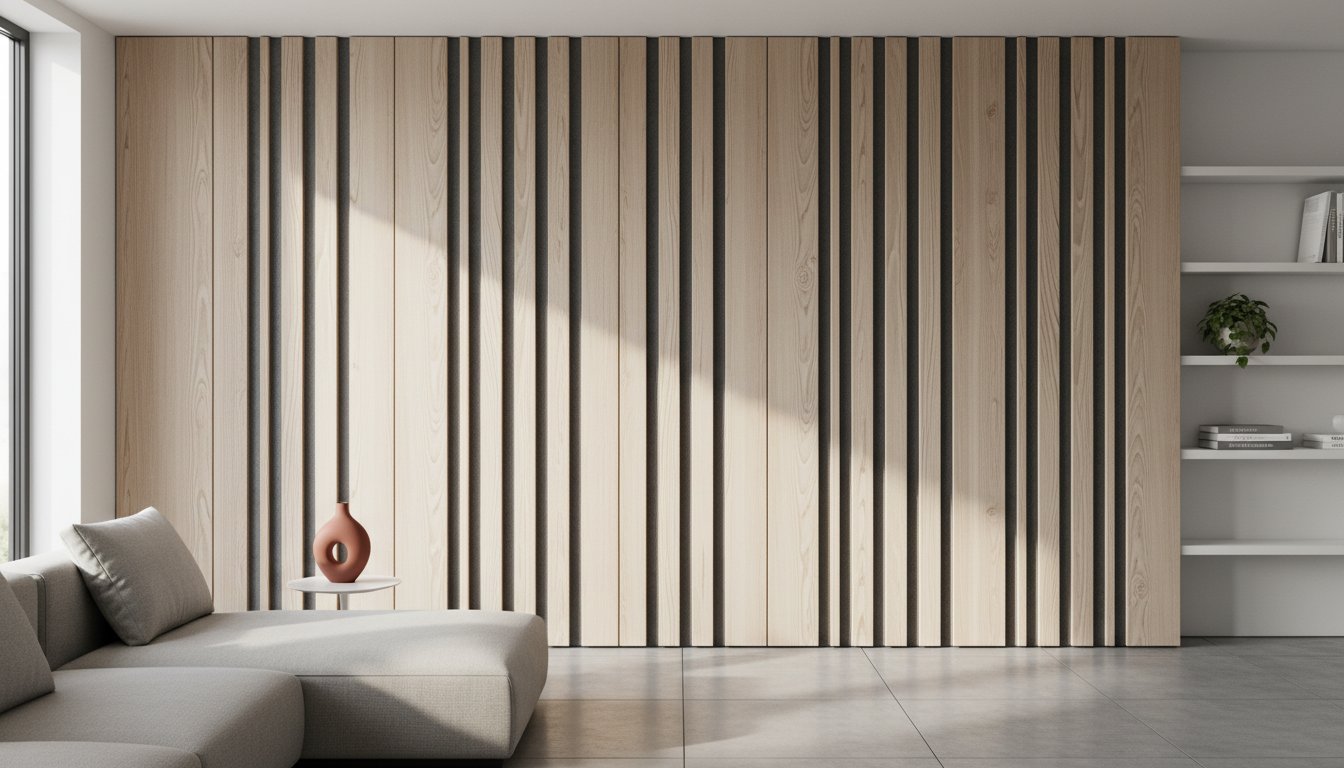
Oak and Ash – Brightness and spaciousness
Oak and ash form the foundation of the Scandinavian design tradition. Oak is known for its robust durability and golden undertones. It serves as a safe, neutral base that suits most environments. Ash, on the other hand, is more lively. Its light surface and distinct, almost dramatic grain give the wall an organic pulse that feels modern and fresh.
When choosing details for your panels, it is wise to invest in solid wood accessories. This ensures that all parts age at the same pace. Veneer and laminate can over time acquire a different shade than the real wood, which breaks the visual harmony. The choice between different surface treatments also affects the end result:
- Oiled oak: Provides a warm, classic tone and emphasizes the wood's natural structure.
- White pigmented ash: Preserves the wood's brightness and prevents the surface from yellowing over the years.
- Matte lacquer: Provides invisible protection that makes the surface easy to maintain in high-traffic environments.
The surface treatment is not just an aesthetic matter. An oiled surface requires some maintenance but can be repaired if an accident occurs. Lacquered acoustic panels and accessories are more resistant to stains and dirt, which is often preferable in public environments or family homes. Regardless of which wood type you choose, it is the craftsmanship and surface finish that determine whether the wall becomes a background or a work of art.
Planning and Installation: How to Succeed with Your Project
Precision is the foundation of craftsmanship. Before ordering your acoustic panels and accessories, meticulous measurement of the room's conditions is required. It's not enough to just count square meters; you need to plan for the panels' width in relation to the wall's dimensions. A standard panel is usually 600 mm wide. Divide the wall's total width by the panel's measurement and always round up. We recommend adding 10 percent for waste to have a margin for cutting and adapting around corners.
Having the right tools at home is crucial for the end result to reflect that exclusive feeling we strive for. Make sure you have the following ready:
- Spirit level or laser level for exact alignment.
- Fine-toothed saw, for example a Japanese saw or a plunge saw with a track.
- Screwdriver and black mounting screws that disappear into the felt.
- Hole saw for neat cutouts around electrical outlets and switches.
- Tape measure and a sharp pencil.
Preparation and cutting
Wood is a living material that breathes. To avoid tension or gaps after installation, the panels should be acclimatized in the room for at least 48 hours. Place them flat on the floor in the environment where they will be installed. When it's time to cut the panel to the correct height, lay it with the wood slats facing down. By sawing from the back through the felt, you reduce the risk of the wood veneer splintering. For finishing strips, precision is even more important. A 45-degree miter cut at the corners creates a seamless transition that gives the wall an architecturally designed finish.
Wall and ceiling installation
Installing on the ceiling presents particular challenges where gravity works against you. Here, adhesive is not enough; you should use at least 15 to 20 screws per panel to ensure that the installation is secure over time. To ensure the slats run linearly across large surfaces, a laser level is your best investment. A deviation of just a few millimeters at the beginning of the wall can grow to several centimeters at the other end of the room.
Handling electrical outlets requires patience. Measure the center of the outlet box and use a hole saw to drill through both felt and slat. This creates an integrated look where technology blends into the design. If you plan to use wood elements in more demanding environments, you can read more about wooden kitchens and design to see how the warm aesthetic of wood can elevate the entire home. By allowing the material to take up space, you create a harmonious whole that lasts for generations.
Find everything you need for your next interior design project in our collection of acoustic panels and accessories that combine function with timeless beauty.
Invest in Quality: Indoor Wood's Range of Acoustic Panels and Accessories
Choosing the right acoustic panels and accessories is a decision that affects both the tranquility of your home and its visual expression for many years to come. At Indoor Wood, we have chosen a path that puts craftsmanship at the center. Through our direct model, where we control the entire chain from production to delivery, we can offer a quality that is often difficult to find in the broader retail sector. This means you get more solid wood, finer veneer, and a more durable acoustic felt for every krona you invest. We have eliminated unnecessary intermediaries to instead allocate resources to material choices that last over time.
We are a family-owned company passionate about the natural beauty of wood. Our selection is carefully curated to meet the demands of modern Scandinavian homes in 2026. A clear example of our ambition is our 270 cm long panels. They are designed to cover an entire wall from floor to ceiling without visible seams, creating an unbroken and exclusive line in the room. We work exclusively with materials that age with dignity, where each lamella is proof of our passion for precision and aesthetics.
To ensure you feel completely confident in your choice, we offer the opportunity to easily order samples directly to your door. There is a big difference between seeing an image on a digital screen and actually feeling the texture of oiled oak or premium walnut against your fingertips. By seeing the material in your own home, in your unique lighting, you can make a decision that feels right in both heart and hand.
Our best-selling accessories
Details make the whole in every interior design project. Our customers often choose our self-produced finishing strips in oiled oak or premium walnut to give the installation a professional framework. These strips effectively hide the end grain and create a smooth, elegant transition to adjacent walls. For those planning a larger transformation, we offer affordable packages for complete wall solutions. The packages include everything from the load-bearing panels to specially adapted mounting solutions that we ourselves have developed to ensure a simple and durable installation.
Personal advice for your interior design project
We see ourselves as your advising partner rather than just an anonymous supplier. Every home is unique, and therefore we are happy to help you custom-order materials or choose the right wood type that harmonizes with your existing floors and furniture. You are warmly welcome to visit our showrooms to experience our environments in reality, but our experts are also available online to answer technical questions about sound absorption and installation.
Explore our full range of acoustic panels and accessories and start your transformation today.
Realize Your Vision with Craftsmanship and Precision
Creating a room with perfect balance requires more than just surface. It's about understanding how materials like solid oak, walnut, and ash interact with both light and sound. By meticulously planning your installation and choosing the right finishing details, you ensure a result that feels as exclusive as it is functional. It is in the details, like the perfectly matched trims, that the true sense of craftsmanship emerges and elevates the entire room's atmosphere.
At IndoorWood, we deliver materials directly from our own production to your door. This means you avoid unnecessary intermediaries and get access to first-class acoustic panels and accessories with fast deliveries across Sweden. Our passion for wood is visible in every fiber, whether you choose the deep warmth of walnut or the Scandinavian simplicity of ash. Every component is selected to create a sustainable foundation in your home.
See the entire collection of acoustic panels and accessories here
Let your next project be an investment in both domestic peace and timeless aesthetics that you will enjoy for many years to come.
Frequently Asked Questions about Acoustic Panels and Accessories
What accessories are absolutely necessary for mounting acoustic panels?
For a successful installation, you will need black mounting screws and a strong MS polymer adhesive. These components ensure that the panels sit firmly without compromising the visual harmony of the room. We often recommend 15 to 20 screws per panel to achieve maximum stability and precision in the craftsmanship. It's about creating a durable foundation for your room's new character and acoustics.
Can I install acoustic panels and accessories in the bathroom?
Acoustic panels should only be installed in dry zones of the bathroom where humidity consistently stays below 60 percent. Natural wood moves with significant humidity variations, requiring good ventilation to maintain the material's shape and luster over time. In zone 1, directly by the shower or bathtub, we strongly advise against installation due to the risk of water damage. Instead, choose a location by the vanity to add warmth to the atmosphere.
How many end strips do I need to order?
You need to order an end strip for each visible side where the edge of the felt would otherwise be exposed to the room. This usually means one strip per outer corner or vertical end to create a framed and professional finish for your project. Measure the total height of your wall carefully before ordering. If your wall is 240 centimeters high, one standard strip per section is usually sufficient to effectively conceal the joints.
Do I need to glue or screw my acoustic panels?
The choice between glue and screws depends on your substrate, but we often recommend a combination for the absolute best results. When choosing the right acoustic panels and accessories, black screws in the felt provide an invisible fastening on wooden studs or plasterboard walls. Glue is an excellent complement on concrete walls where you want to avoid drilling too many unnecessary holes. It creates a clean and unbroken surface that breathes timeless Scandinavian design.
Are there accessories for installing acoustic panels on the ceiling?
Yes, there are specific ceiling screws with smaller heads that are specially designed for secure ceiling installations. For ceiling mounting, safety is the highest priority, so always use accessories that can handle the panel's weight of approximately 8 to 10 kilograms per square meter. By using the correct fasteners, you ensure that your acoustic panels and accessories remain securely in place for many years to come. This creates an enveloping and dampened sound environment throughout the home.
How do I hide joints between two acoustic panels?
You hide the joints by letting the felt of one panel overlap the edge of the adjacent panel with precise accuracy. Since the width of the felt is standardized, a natural transition is created that makes the joint virtually invisible to the naked eye. It is the precision of the craftsmanship at the moment of joining that determines whether the wall appears as a unified surface. A correctly installed panel wall should feel like a cohesive artwork of genuine wood.
Which wood type for accessories best suits a dark interior?
For a dark and sophisticated interior, smoked oak or walnut are the most prominent and popular choices. These darker wood types harmonize beautifully with a black acoustic felt and create a depth that feels both luxurious and genuinely earthy. Walnut's warm grain provides a vibrant feel that contrasts with sleek, modern materials in the room. It is an investment in an atmosphere that exudes exclusivity and craftsmanship.
Can I paint or stain the accessories myself?
It is perfectly fine to stain or oil the wooden strips yourself to achieve a specific shade that perfectly matches your floor. However, be careful not to get paint on the sound-absorbing felt, as this can clog the pores and significantly impair sound absorption. We recommend a high-quality hard wax oil to preserve the wood's natural texture and protect the surface from wear. This gives the accessories a durable and personal touch.
